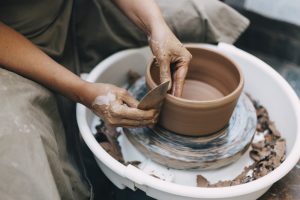
Details from https://www.claycraft.co.uk/initiatives/olive-dish-summer season-tableware/
This dish is designed to abet olives, however, clearly, you can put it to use for any sequence of meals. The tiny bowls at the sides are to hand for cocktail sticks, oil for dipping your bread, and even for olive stones. It’s a to hand dish that will grace any desk
It is most likely you will need:
Red earthenware clay preferably, however in any other case clay of decision
Inflexible oval ancient (glimpse tip field below, or for minute print on straightforward how to assemble a bisque template, glimpse here
Paper, pencils, craft knife, decreasing mat (optional)
Thick foam block – style old for upholstery
Mayco Foundations white glaze
Mayco Stroke & Coat colours for ornament – at the side of shaded
TIP Search for for wooden templates in craft shops. You presumably can pick them ready cut as mounts for diverse crafts. They are accessible in in an excellent deal of shapes and sizes, or you’ll be ready to chop your dangle with a jig saw.
• Different supplies consist of thick acrylic or plastic sheet, and even very thick card.
• Manufacture handles from wooden knobs or wine corks – it is miles a amazing job of recycling, and they are going to without considerations be stuck onto the template with glue.
1
Working on a huge sheet of paper, situation your template ancient at the centre and arrangement around the perimeter.
2
– Olive
Rob the ancient from the paper, then measure and price a distance of 3cm extending out from the pencil line the final scheme around the circumference.
Join the marks as much as assemble a accurate line, then cut the shape out with a craft knife.
3
Prepare a block of clay – sizable ample to accommodate your template plus a tiny spare when rolled out. The amount will depend upon the dimensions of the dish you prefer to assemble, so specifics can’t be given.
Working on the sheet of plastic, decrease the wide majority of the clay by beating it with the aspect of your rolling pin. Work in measured, even strokes from one aspect of the clay to the opposite to protect a long way from making deep grooves within the bottom.
Roll out the clay between your roller guides. It is most likely you’ll safe that periodically turning the slab will assemble rolling grand more uncomplicated and present you with additional administration to enact the approximate shape that you just require – conserving it oval as a long way as most likely shall be purposeful in this case.
Once rolled out, gentle over the bottom of the slab with a rib to compact the clay.
4
Situation the template on the slab with the ancient in situation at the centre, then arrangement around the circumference again with a pencil to transfer the outline to the clay.
5
Rob the ancient, then holding the template in situation on the slab with one hand, in moderation cut the shape out.
Reserve the closing slab below plastic for utilize later.
6
If you steal the paper template off the slab, you can nonetheless be ready to search the outline of the ancient clearly impressed within the clay.
7
Carefully turn the cut shape over onto one other sheet of plastic and aloof over the bottom with a rib.
8
Lifting the slab in moderation on the plastic sheet, turn it over onto your foam block so as that you just’ll be ready to now glimpse the outline for the ancient clearly.
Rob the plastic sheet.
9
Take a seat the ancient on the slab, aligning it to the impressed outline, then press down firmly into the foam block unless the sides of the dish arise.
10
It’s usually most likely to steal the dish off the foam with the template nonetheless in situation – this makes transferring it to one other floor genuinely straightforward. In the occasion you’ll be ready to achieve this, situation the dish on a wooden batt and simplest then steal the ancient out.
In the occasion you’ll be ready to’t transfer the dish in this style, in moderation transfer it to the batt, taking care – as a long way as most likely – no longer to distort the shape.
11
Very in moderation pinch the prolonged ends of the dish collectively unless they search spout-savor. This would have the enact of raising the aspect partitions even extra vertically.
Leave the dish to agency to leather exhausting in this space.
12
Weigh out two 57g quantities of clay and assemble each and each of them correct into a ball.
Maintaining the first ball in one hand, press down into the centre along with your thumb unless you’ll be ready to genuinely feel some strain for your palm.
13
Exiguous by tiny, begin as much as lengthen the width of the unfavourable to roughly 4cm by drawing your thumb all around the bottom to the wall.
14
At the same time as you have to need established the unfavourable, pinch the wall up vertically unless it is miles an even 4-5mm thick and the the same height as the wall of the dish.
15
Repeat this to assemble the 2d bowl in fair the the same scheme. Scheme, as a long way as most likely, to assemble the bowls the same in size.
16
Work around the wall of each and each bowl with a rib to gentle the bottom and take away away any irregularities within the clay.
17
Flip the principle dish and one of many bowls the opposite scheme up, then space the bowl half of-on and half of-off the bottom, as confirmed.
Trace this semi-circular space with a pin.
Repeat this at the reverse discontinue, with the 2d bowl.
18
Having a agree with in mind at the dish lengthways, nonetheless in its upturned space, ranking a line from each and each discontinue of the semi-circle, straight aid in direction of your boDon’ton’t be tempted to chop down the sides!
Carefully cut the sections out and discard them.
19
Flip the dish correct, then situation the minute bowls within the cut-away areas at each and each discontinue to verify the match.
Trace the point the establish the wall of the dish will attach to the bowl on each and each aspect, again the usage of your pin.
20
Fetch the marked space on the first bowl and the adjoining fringe of the dish, then be aware gallop to both.
21
Receive the bowl into the dish, making particular the surfaces meet and join thoroughly.
Repair the 2d bowl in situation within the the same scheme.
22
Now toughen around the joins on the interior of the dish with coils of soppy clay, mixing them in first with a wooden instrument, then neatening up with a finger to gentle the bottom. Beware; it’s a somewhat tricky join to neaten up due to the tight angles, attributable to this reality the utilize of the wooden instrument.
23
Strengthen the joins on the undersides of the dish within the the same scheme, the usage of coils of soppy clay, however this time neaten up with a rib unless the bowls search integral to the assemble.
24
Carefully surform the rim of the dish, at the side of the bowls, unless they’re an even and stage height.
25
Work over the surformed edges with a rib to spherical them off and neaten them up.
26
Measure the inner depth of the dish, then cut out a strip of clay from the slab reserved from earlier to the the same depth. The length must lengthen all around the centre of your dish from the aspect of 1 of the bowls to the reverse aspect of the bowl at the opposite discontinue, so work this out accordingly.
Existing – You presumably can glimpse the approximate shape for the ends of the divider from the photograph, however you can must cut yours to compare the angle of your explicit dish.
27
Take a look at the dimensions of the dividing strip within the dish and assemble modifications if required; then, ought to you’re exclusively happy, price the distance for the divider along with your pin.
28
Carefully ranking the marked space with the tip of a serrated rib plus the adjoining edges of the divider.
Practice gallop to both surfaces when ready.
29
Repair the divider in situation, then toughen it on each and each aspect with a coil of soppy clay.
Blend the coil in first with a finger, then neaten up with a rib.
30
Roll a 24cm length of coil roughly 8mm thick, then cut it into two equal lengths.
This would assemble the address for the dish, and the dimensions is simplest a manual – you’ll be ready to modify it to swimsuit your dish if the given size doesn’t seem prolonged ample or too prolonged.
31
Fetch along the length of 1 aspect of each and each of the coils, be aware gallop to both scored areas, then match the coils collectively, leaving 2cm splayed apart at each and each discontinue.
32
Put the address on the dividing wall, then price the distance with a pin.
Rob the address again and ranking and gallop all adjoining surfaces.
33
Gently pinch the ends of the address onto the divider, making particular they’re accurate.
34
Neaten up the join between the 2 coils with a suitably fashioned wooden instrument or rib.
35
Neaten around the ends of the address, then galvanize a minute element in each and each body to enact off – this could have the added enact of creating the join extra accurate in addition to wanting factual.
36
Enable your dish to dry out slowly forward of bisque firing.
DECORATING THE SURFACE OF THE OLIVE DISH
The manner chosen here to present a boost to the dish is a cheat’s Majolica methodology the usage of commercially ready glazes. It is miles a blinding foolproof version that doesn’t allow for a long way to bound vulgar, unlike correct Majolica, which takes somewhat a pair of apply to pleasant.
37
Launch up by painting your entire interior floor of the dish, at the side of the address, with white Foundations glaze. Lengthen the glaze to consist of the outer partitions when ready, then allow this indispensable coat to dry forward of applying a 2d coat.
38
Plan an olive and leaf invent on tracing paper the usage of a soft pencil. Manufacture one drawing to compare the unfavourable on either aspect of the dividing wall and one other to compare the sides of the dish.
39
You presumably can utilize the Stroke & Coat colours straight from the bottle, however they’re moreover mixable, so while you happen to favor to tone the colours down a tiny, factual decant the required amount correct into a paint palette and add a brush tip’s price of shaded. Mix the colours collectively successfully and repeat if foremost unless you bag the coloration you wish.
40
Situation the unfavourable tracing within the dish – pencil-aspect down, then arrangement over the invent to transfer it to the bottom.
41
Repeat on the opposite aspect of the dividing wall and while you happen to safe the transfer is extremely faint, bound over the traces in pencil to sharpen the outline up.
42
Continue the transfer job on the sides of the dish, repeating the invent as frequently as required around the wall.
43
Paint within the olives first, the usage of your mixed color. You presumably can be aware the color in a painterly, watercolour scheme with brushstrokes that allow the white unfavourable to establish by means of, or be aware the color extra thickly for a graphic enact.
44
Once the final olives were painted, transfer on to the leaves and paint them within the the same scheme.
45
Dwell off the invent by outlining the invent in shaded, at the side of the stems and any other feature minute print you prefer so as to add.
46
In the occasion you’ve made your dish in an earthenware body, it’s somewhat acceptable to glaze the underside and fire the assemble on huge title props. This makes the in any other case somewhat porous body impervious to water and attributable to this reality extra hygienic.
Practice two coats of glaze, as you per chance did on the higher floor. In the occasion you’ve worked in stoneware, leave the underside unglazed and fire the dish straight on the kiln shelf.
47
Enable the glaze to dry out thoroughly forward of firing the dish to your clay’s optimum temperature.
This dish was created from purple earthenware clay and glazed in Mayco Foundations white glaze, with colours mixed from the Stroke & Coat vary for the olive invent.
Bisque-fired to cone 04 (1060°C, 1940°F) and glaze-fired to cone 05 (1046°C, 1915°F) in an electrical kiln.
This project first featured in space 52
Click on here for extra initiatives
Critical Links
https://www.blogtalkradio.com/searynqlka
https://answers.informer.com/user/muirengcza
http://www.authorstream.com/beleifuzqc/
https://www.theodysseyonline.com/user/@moenusykjw
https://sketchfab.com/ismerdgild
https://500px.com/p/eeumavg801
https://www.blurb.com/user/axmytxc662
https://www.demilked.com/author/ruvornnmwt/
https://hackerone.com/galdurruad
https://www.ulule.com/personjeod/
https://www.metal-archives.com/users/paxtontrdc
https://musescore.com/user/43603127
https://devpost.com/hojawwt532
https://ello.co/aspaidcqak